new Keyboard(40%, ortholinear)
conception
I have a ritual of getting a new keyboard every time I start a new job. I’m not sure why I do it, but it’s a good way to get myself excited about the code that I will get to write and the work I will do. Most recently, I decided to build my own keyboard by hand and on the cheap. I’m talking 3D printed case, cheap switches, and generic keycaps. The only thing I splurged on was the microcontroller. (more on that later).
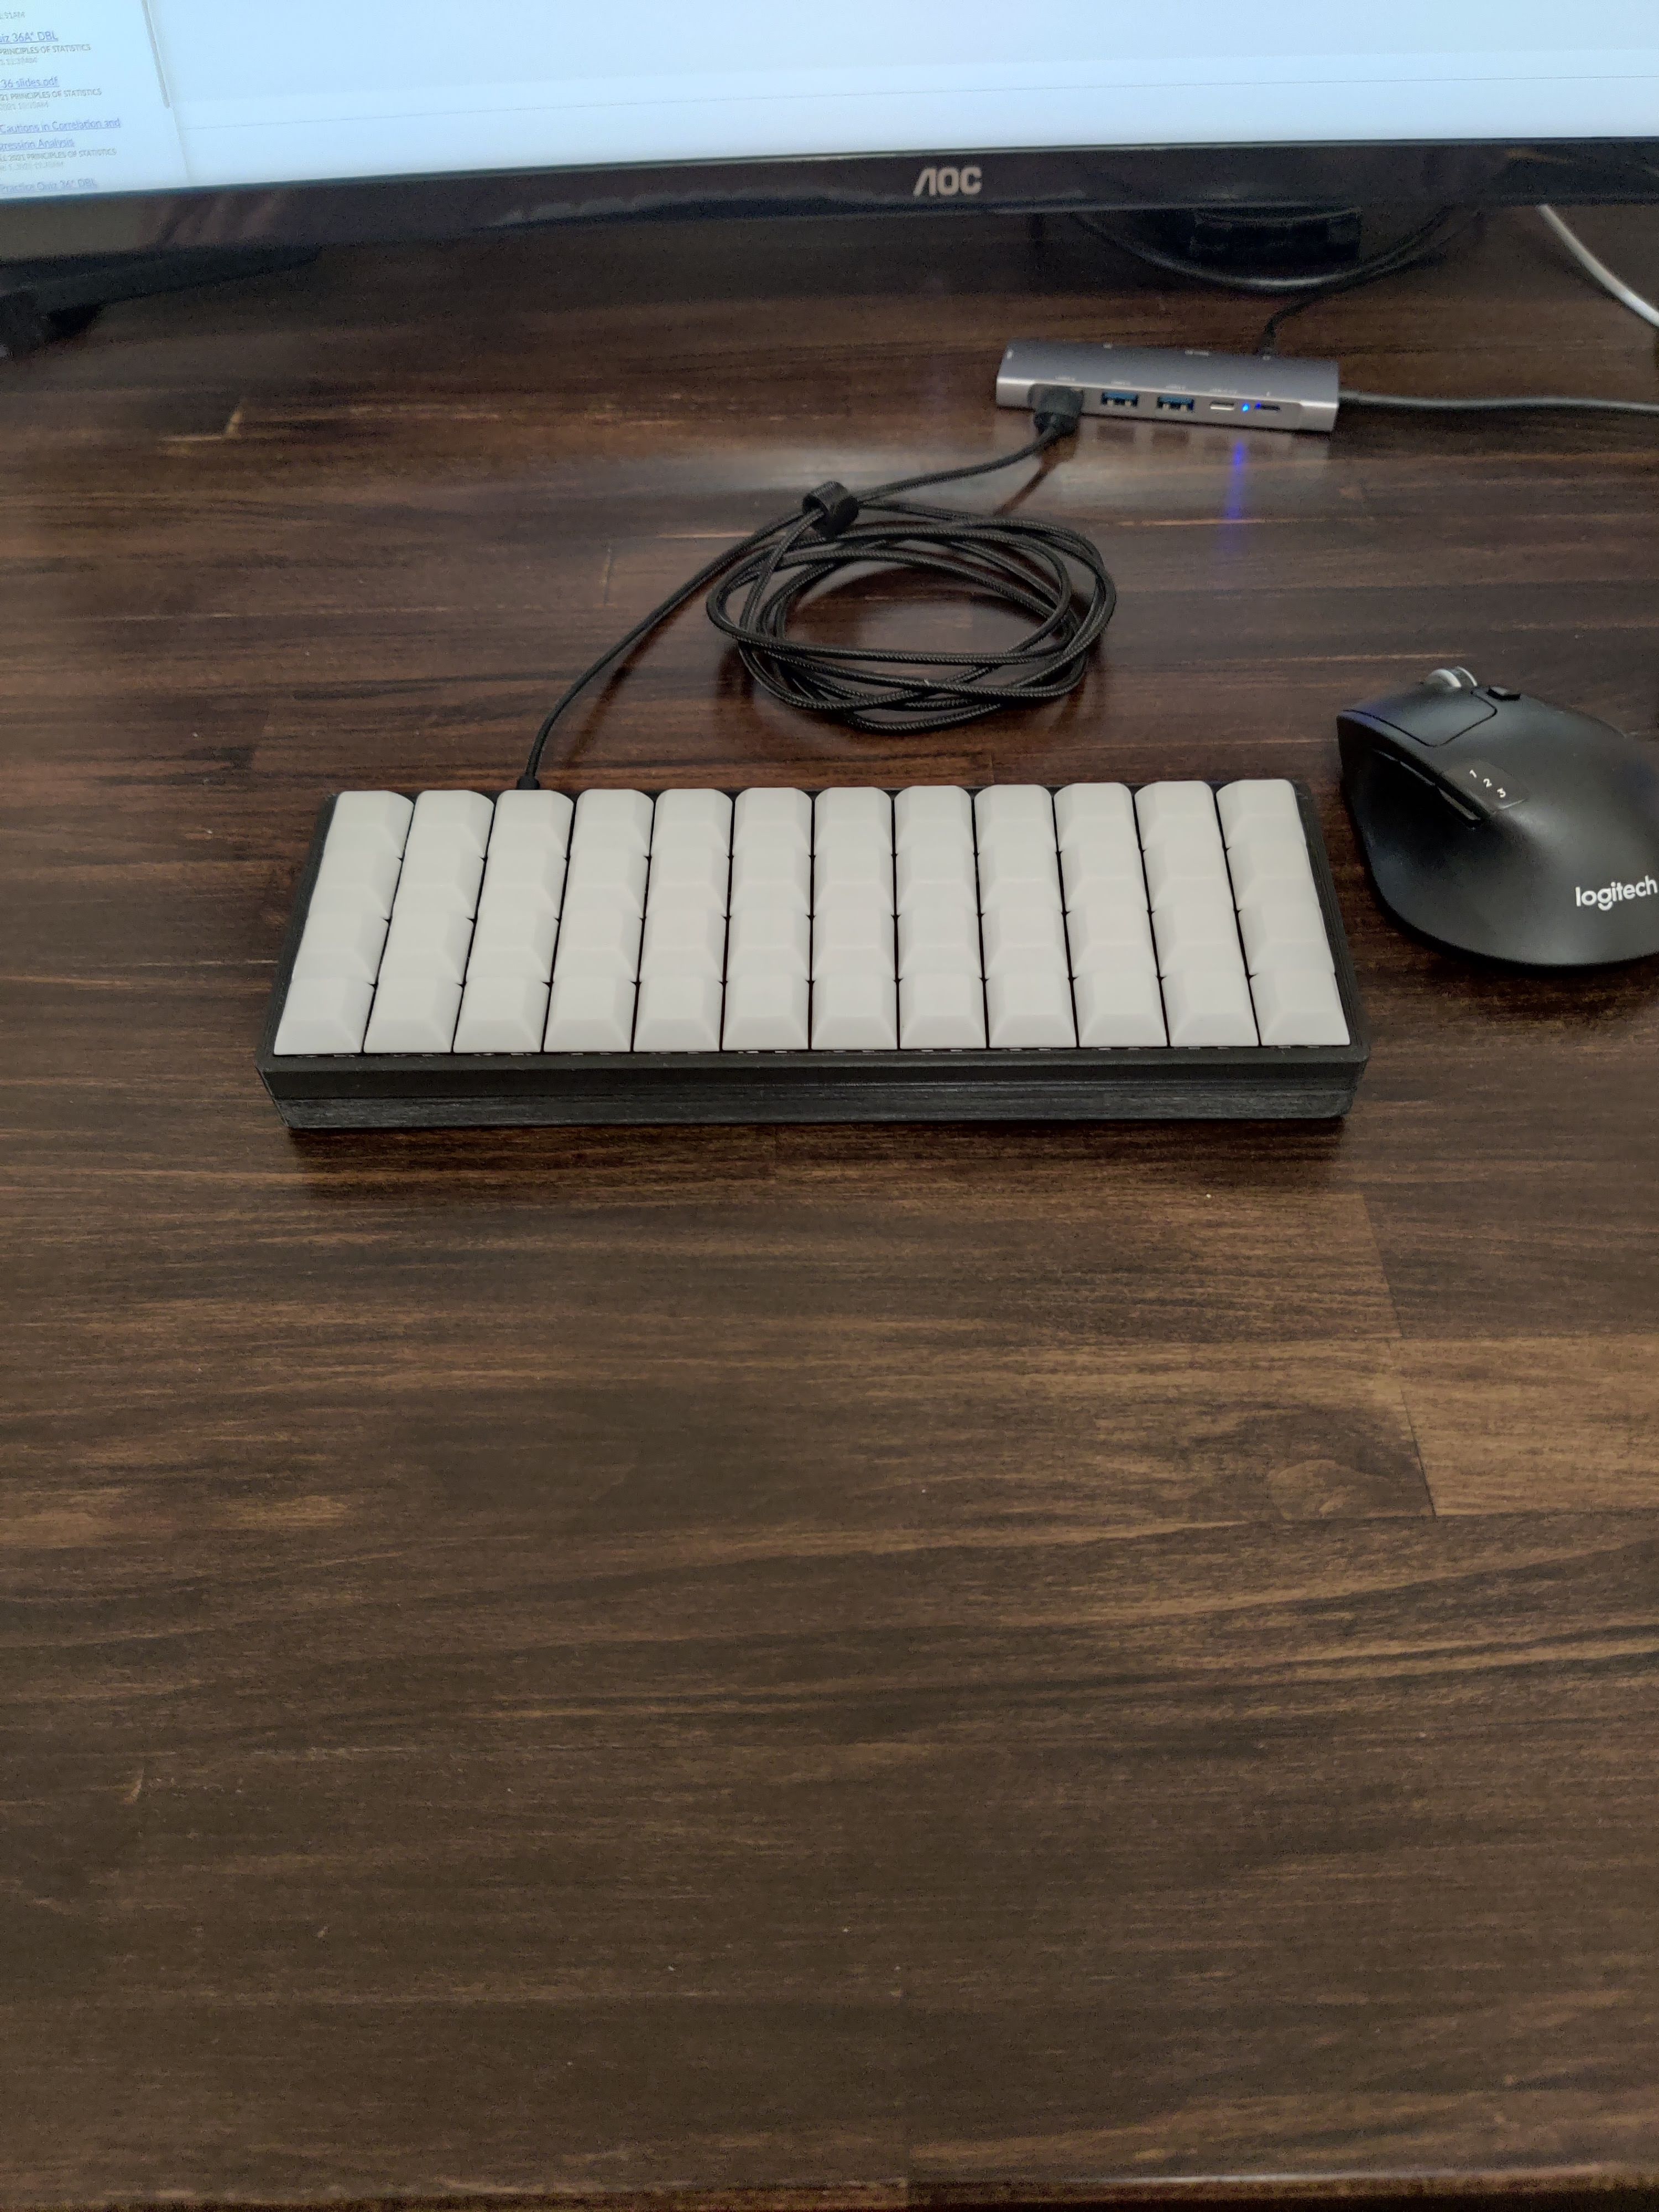
Because I decided to make my keyboard by hand however, I was eager to make something unique and special. After all, custom keyboards can be as much about self-expression as they are productivity. Inspired by the look and the practicality of the Ergodox Planck EZ I decided to build a 40% ortholinear keyboard, but at literally less than half the price.
the case
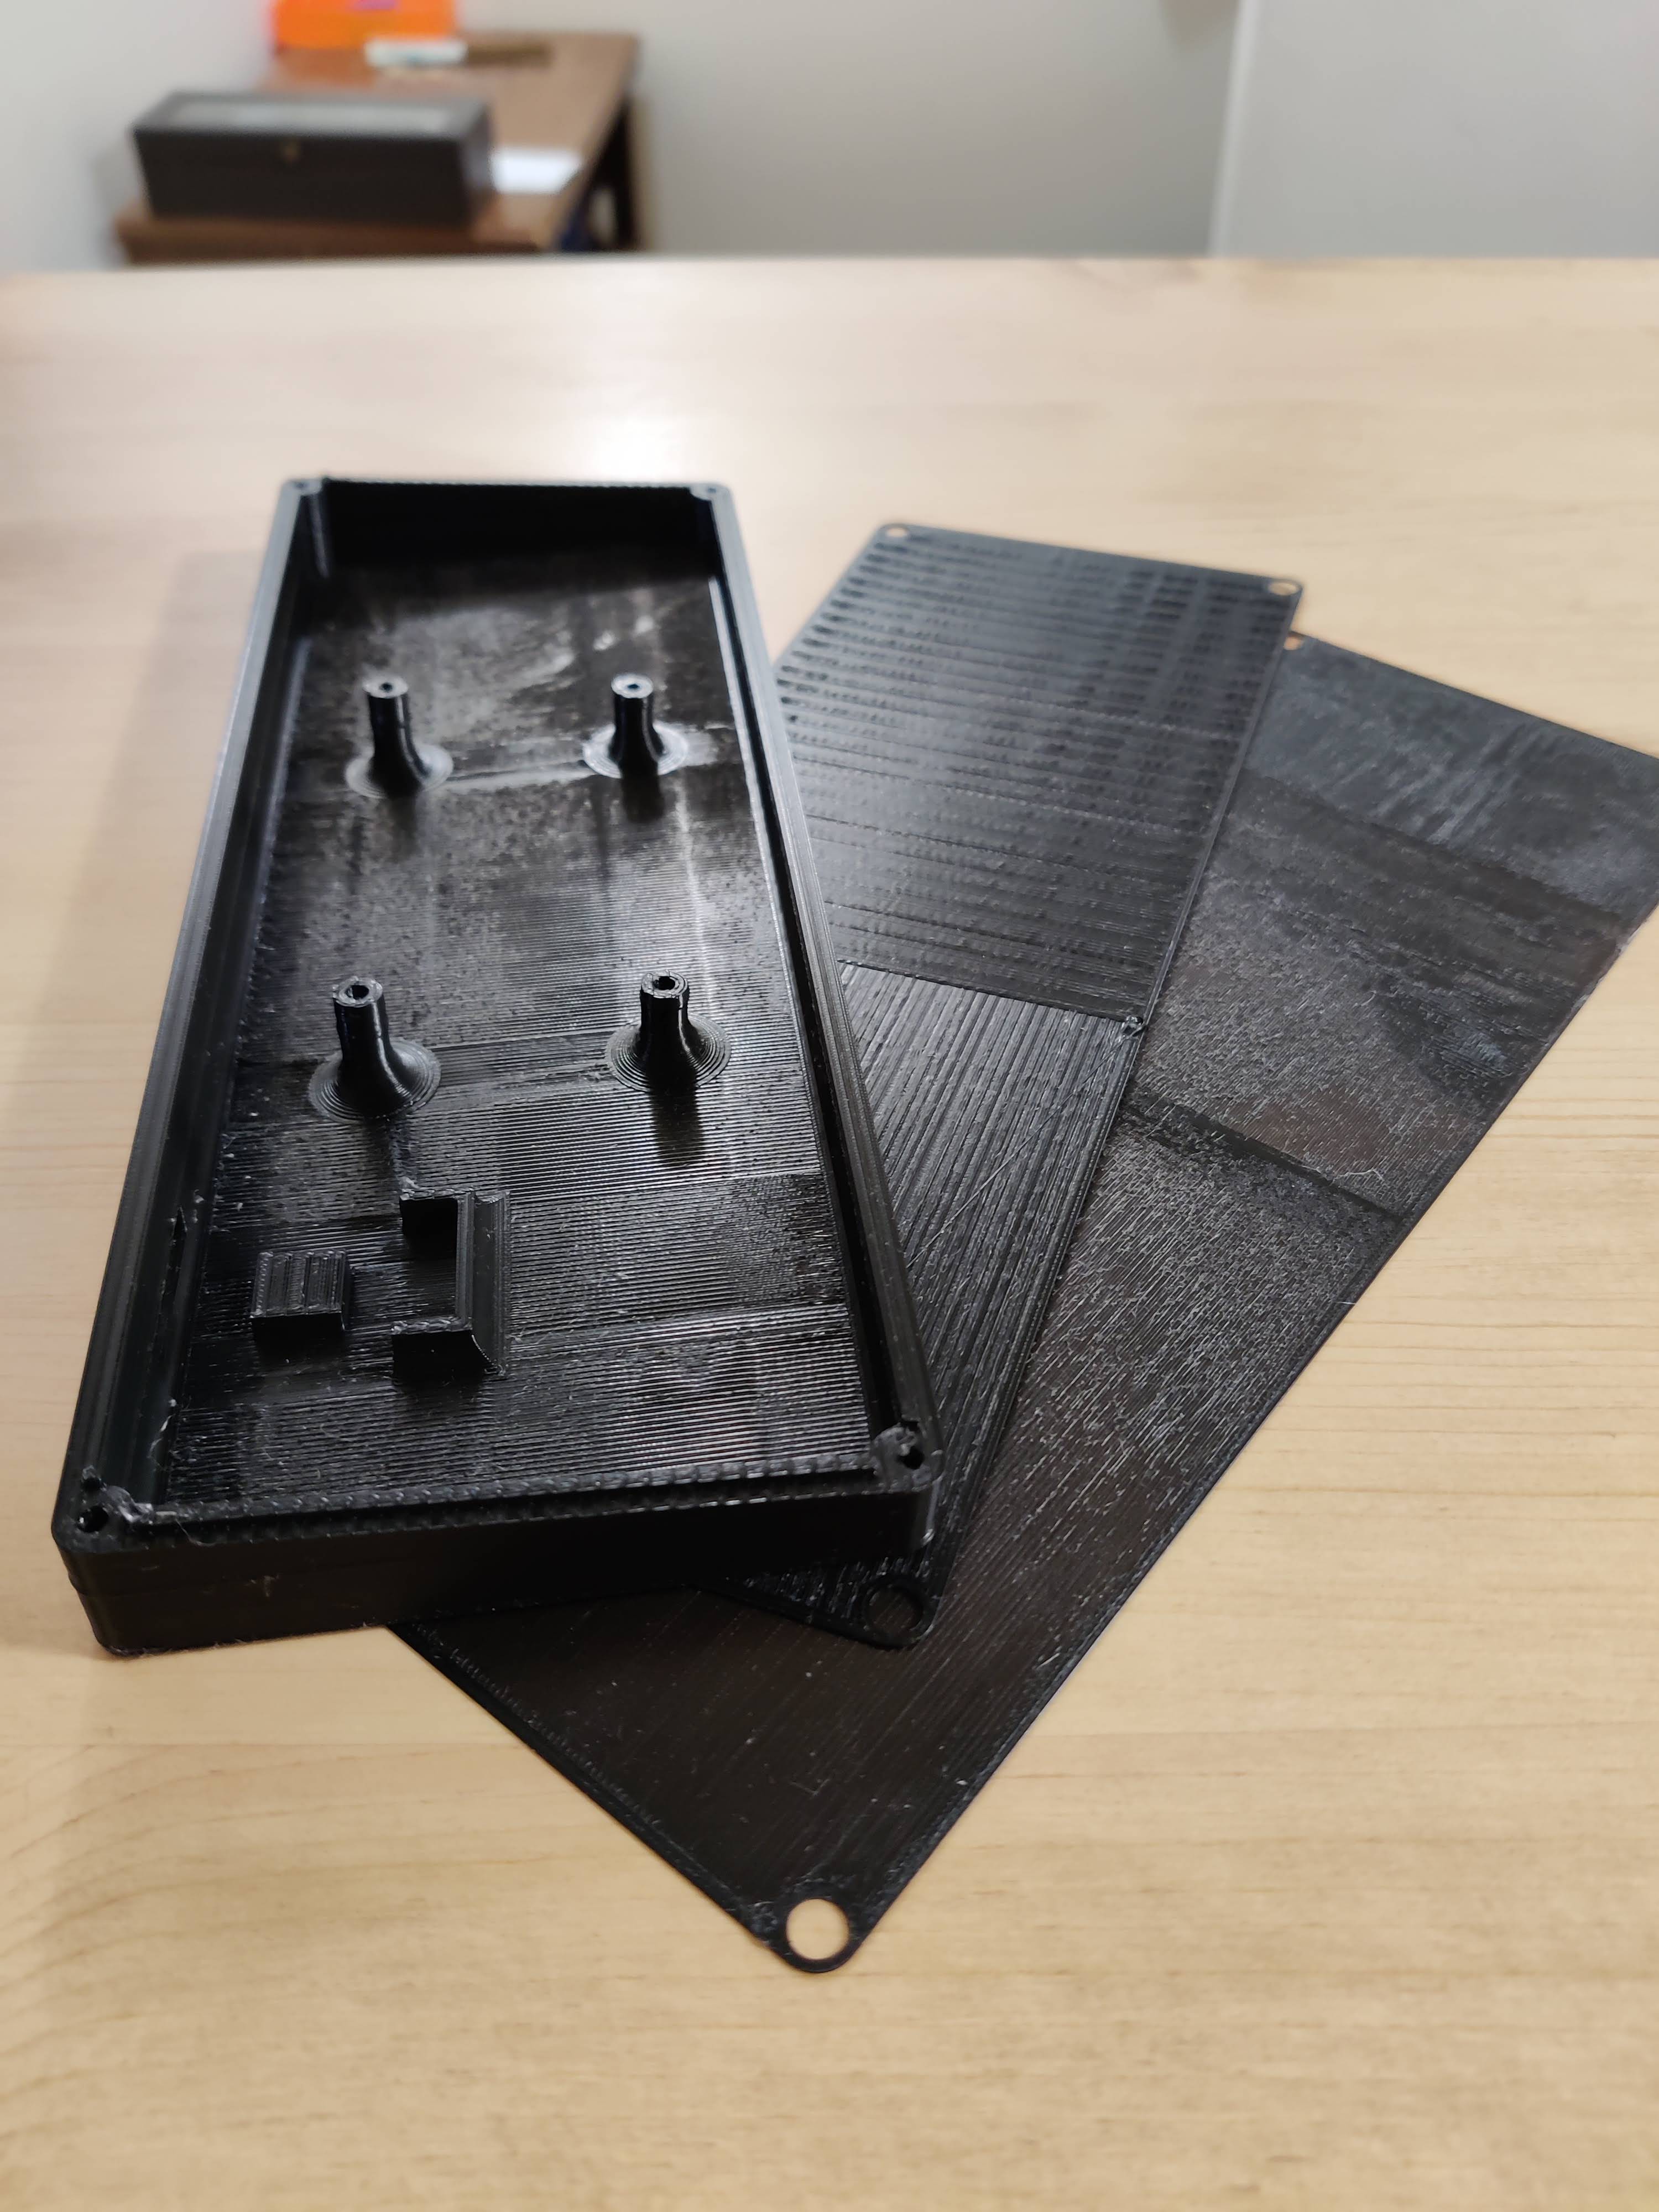
The case was by far the hardest part of the build. I decided to go with the Void40. 3D printing this guy was a real pain in the @$$. This 3D print is specifically made to fit on the bed of an Ender 3 (the same printer I have) when printed diagonally. While the 3D model’s dimensions are just the right size to fit on the physical print bed, the stock Ender 3 firmware restrictions do not let you use the full print bed area. Instead, there is a safety of 15mm in both the x and y direction.
Here’s a image showing just how close the stock Ender 3 is to being able to print this keyboard case.

After half a dozen failed prints I discovered that I needed to install custom firmware on my 3D printer to get access to the full size bed in software. Using this guide, I was finally able to successfully print a full case.
the switches and keys
I was on a budget so Gateron mx style switches were a natural choice. I went with brown since I like the tactile feel, but wanted to maintain relationships with the people I work with in-office. Clicky switches are for kids is my hot take. For keys, I just went with generic blank XDA keycaps. The best prices that I could find were on flashquark.
microcontroller and misc parts
I have had bad experience with bluetooth keyboards in the past due to their long delays when starting to type, or with the latency in the connection. Because of this I was fine with a wired keyboard as long as it was USB type C. At this point, nothing in my life except my Ti-84 calculator used micro USB. Naturally, I chose the Elite C micro controller.
Other miscellaneous parts included plenty of diodes, heat shrink tubing, wiring, and hardware to close the case up with its components.
assembly
Putting together the components is simple, but just time consuming. Because, I didn’t use a PCB, connecting all the switches requires soldering a diode and a wire to each row and column of the switches. Because my keys were laid out linearly, it wasn’t hard to figure out where to solder what. Here’s what the internal wiring looks like

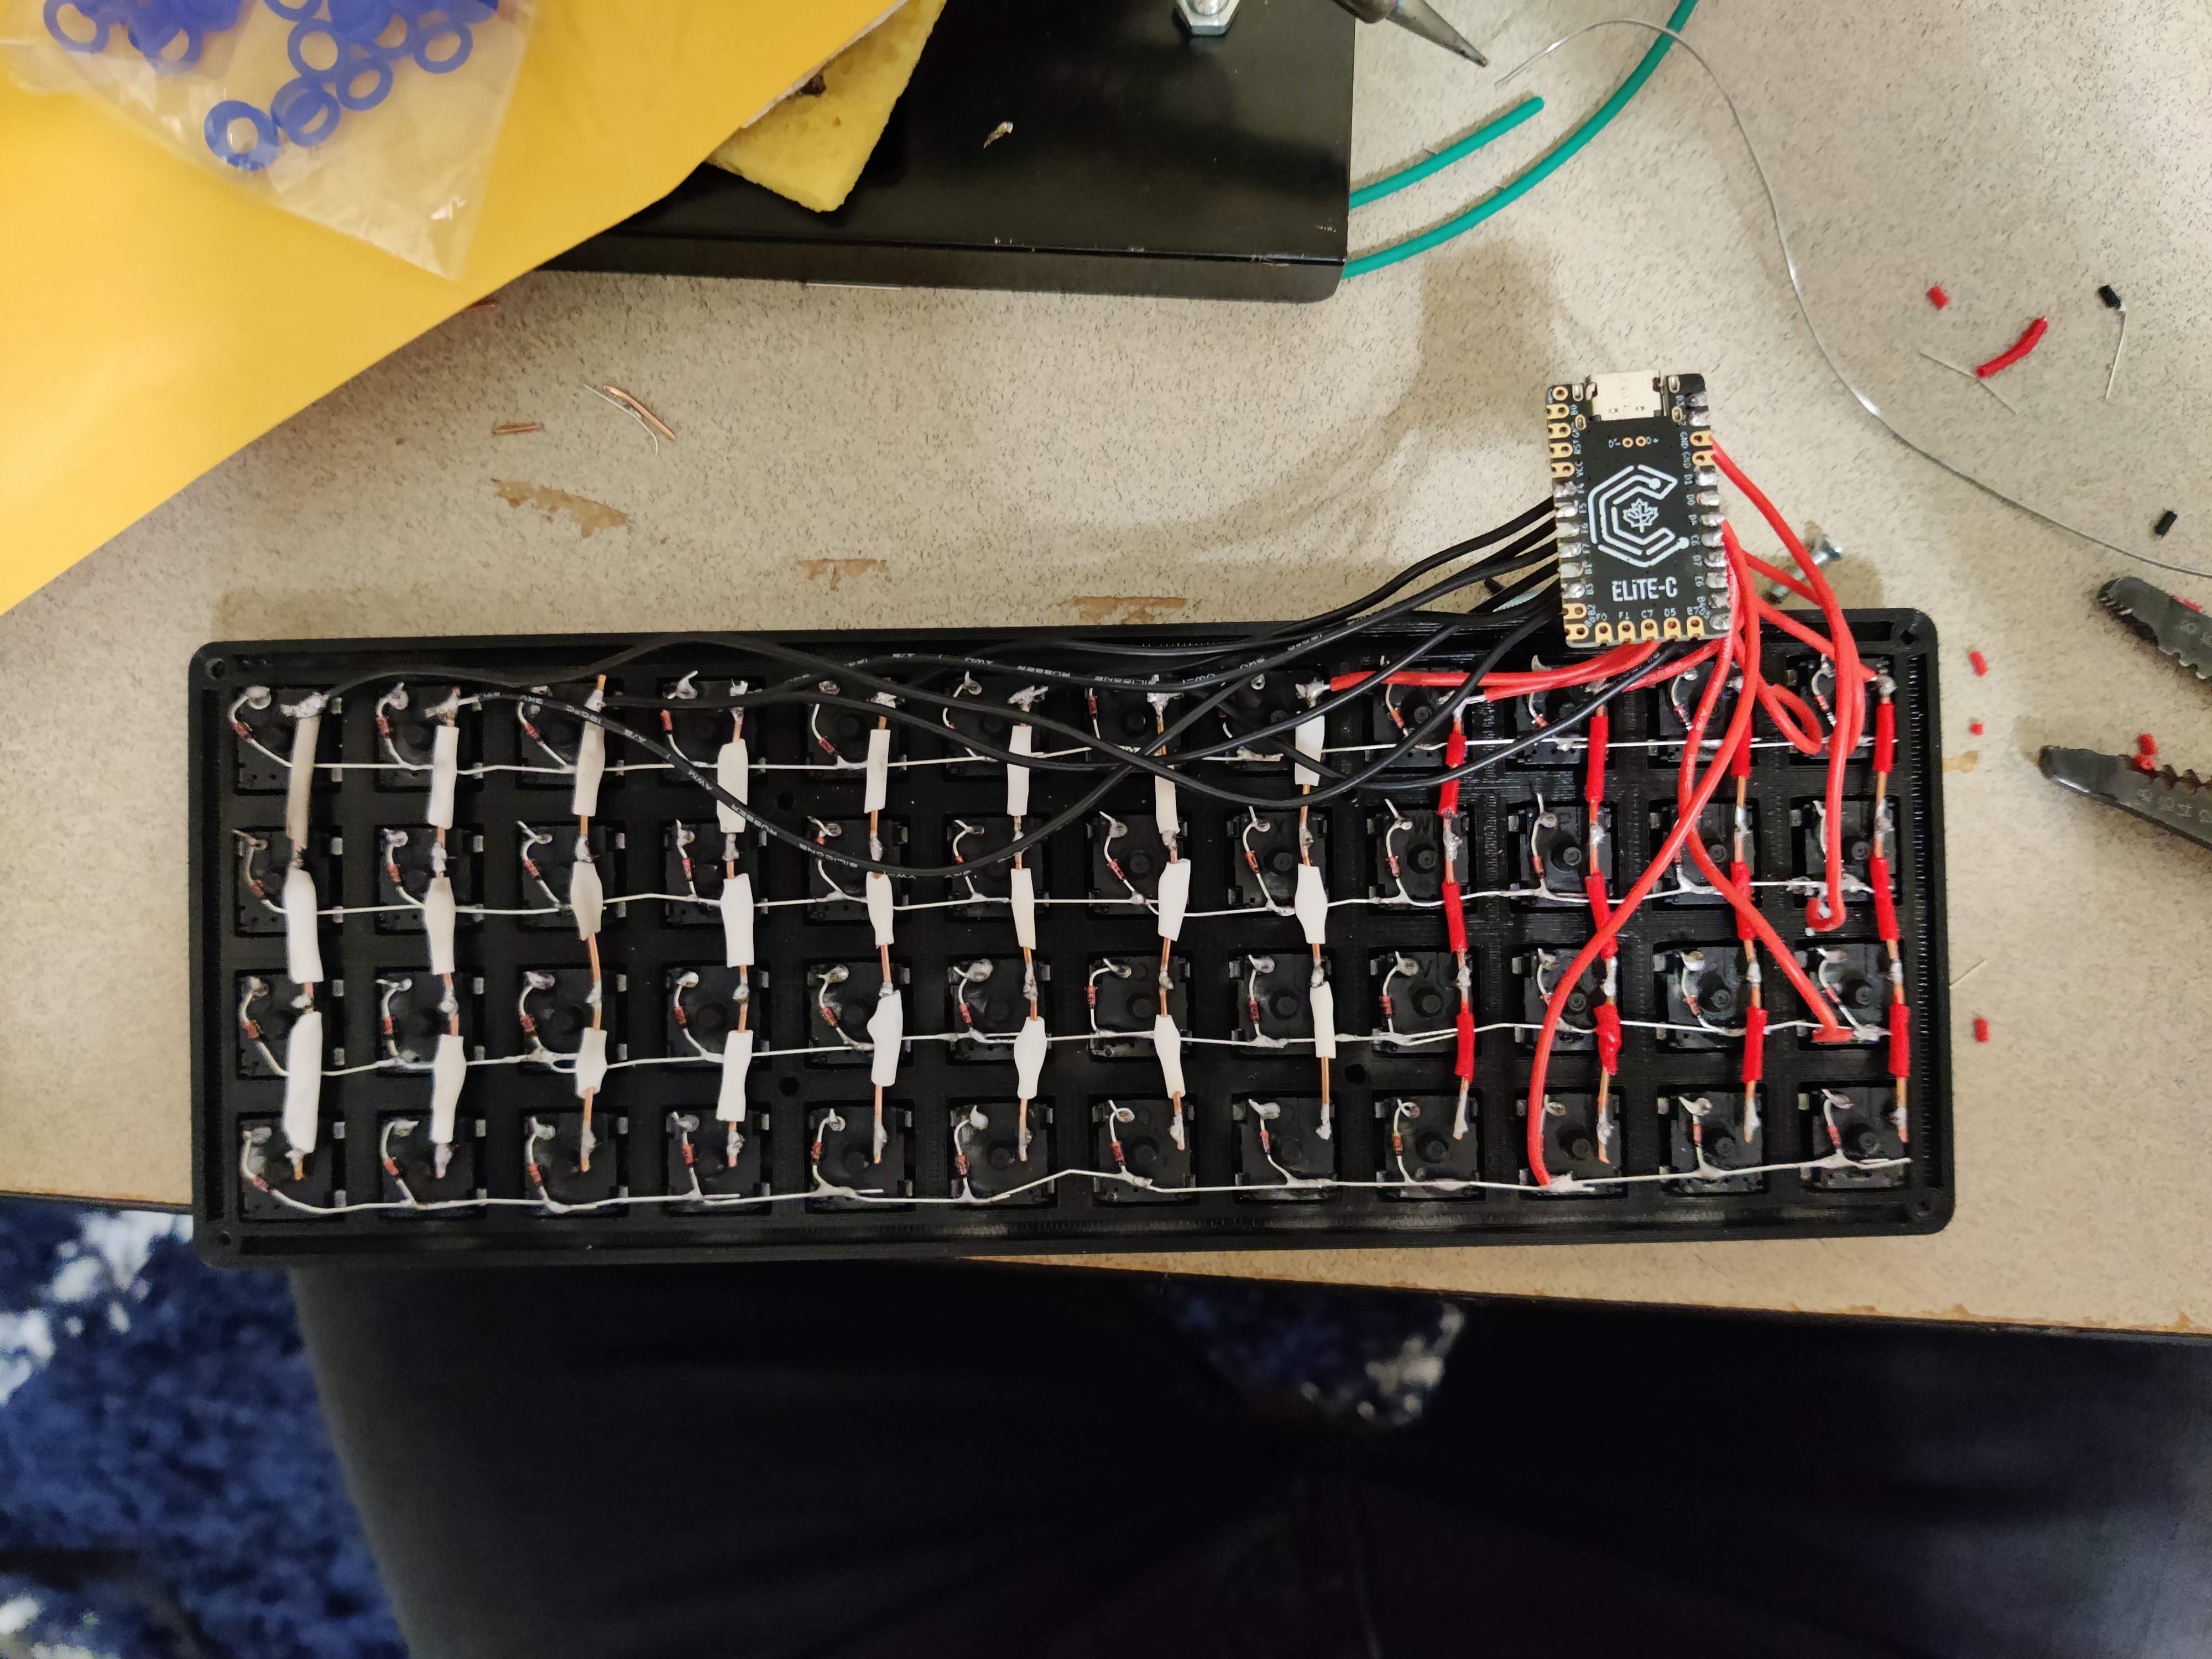
If you look closely, you can see each row and column’s wiring go to a connection on the microcontroller. When a key is pressed, the connection is closed on a row and column. This allows the microcontroller to determine which key was pressed by checking which row and column’s circuit was closed. Effectively an X and Y coordinate for each key on the board.
programming
QMK is a opensource firmware for microcontrollers that are commonly used in keyboards. It allows for people to make their own keymappings for their custom builds as well as manufactured boards. I used QMK to program my microcontroller. The maker of the VOID40 keyboard case has their own fork of QMK that provides a great starting point for keymapping.
I wanted to make my keyboard as efficient as possible for programming by placing commonly used special symbols as close as possible to the home row.
Here’s my layout with the 3 different layers.
/* Qwerty
 * ,-----------------------------------------------------------------------------------.
 * | Tab  |   Q  |   W  |   E  |   R  |   T  |   Y  |   U  |   I  |   O  |   P  | Bksp |
 * |------+------+------+------+------+------+------+------+------+------+------+------|
 * | Esc  |   A  |   S  |   D  |   F  |   G  |   H  |   J  |   K  |   L  |   ;  |  '   |
 * |------+------+------+------+------+------+------+------+------+------+------+------|
 * | Shift|   Z  |   X  |   C  |   V  |   B  |   N  |   M  |   ,  |   .  |   /  |RShift|
 * |------+------+------+------+------+------+------+------+------+------+------+------|
 * | LCtrl|      | LGUI | LAlt | Lower| Space| Space| Raise| Left | Down |  Up  |Right |
 * `-----------------------------------------------------------------------------------'
 */
/* Lower
* ,-----------------------------------------------------------------------------------.
* |   ~  |   !  |   @  |   #  |   $  |   %  |   ^  |   &  |   *  |   (  |   )  | Bksp |
* |------+------+------+------+------+------+------+------+------+------+------+------|
* | Del  |  F1  |  F2  |  F3  |  F4  |  F5  |  F6  |   _  |   +  |   {  |   }  |  |   |
* |------+------+------+------+------+------+------+------+------+------+------+------|
* | Caps |  F7  |  F8  |  F9  |  F10 |  F11 |  F12 |ISO ~ |ISO | | Home | End  | Enter|
* |------+------+------+------+------+------+------+------+------+------+------+------|
* |      |      |      |      |      | Play | Play |      | Prev | Vol- | Vol+ | Next |
* `-----------------------------------------------------------------------------------'
*/
/* Raise
* ,-----------------------------------------------------------------------------------.
* |   `  |   1  |   2  |   3  |   4  |   5  |   6  |   7  |   8  |   9  |   0  | Bksp |
* |------+------+------+------+------+------+------+------+------+------+------+------|
* | Del  |  F1  |  F2  |  F3  |  F4  |  F5  |  F6  |   -  |   =  |   [  |   ]  |  \   |
* |------+------+------+------+------+------+------+------+------+------+------+------|
* | Caps |  F7  |  F8  |  F9  |  F10 |  F11 |  F12 |ISO # |ISO / |Pg Up |Pg Dn | Enter|
* |------+------+------+------+------+------+------+------+------+------+------+------|
* |      |      |      |      |      | Play | Play |      | Prev | Vol- | Vol+ | Next |
* `-----------------------------------------------------------------------------------'
*/
end()
I’m absolutely thrilled about how this board turned out. I was worried about a cheap feel, but the 3D printed case holds up great. The ortholinear layout seemed daunting at first, but I believe that anyone with decent touch typing skills would easily be able to start using the keyboard at decent speed.